Jirban is a Kanban board integrating with Jira. It is implemented as a Jira plugin with an Angular 2 client running in the browser. Its main purposes are:
- to address some of Jira Agile's short-comings when it comes to how it displays the boards. Effectively this means horizontally scrollable boards, with collapsible colums.
- to make setup of filters and swimlanes less static, minimising the need for configuration. Since we are using a 'fat' browser client, all changes to the view purely happen on the client side with no need for extra round trips to the server.
This file shows you how to use Jirban from a user's point of view. If you are interested in contributing, we also have a Developers Guide in the main project README.md.
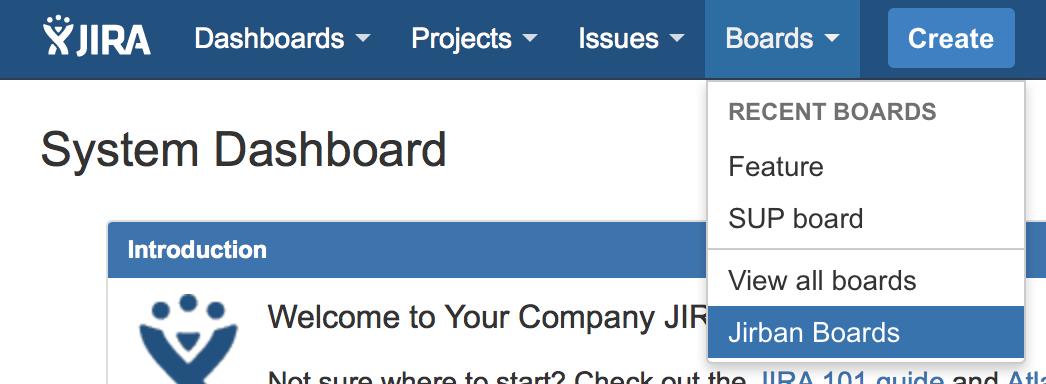
To get to the Jirban boards, log in to your Jira instance, and then click on the 'Jirban Boards' entry in the 'Boards' menu:
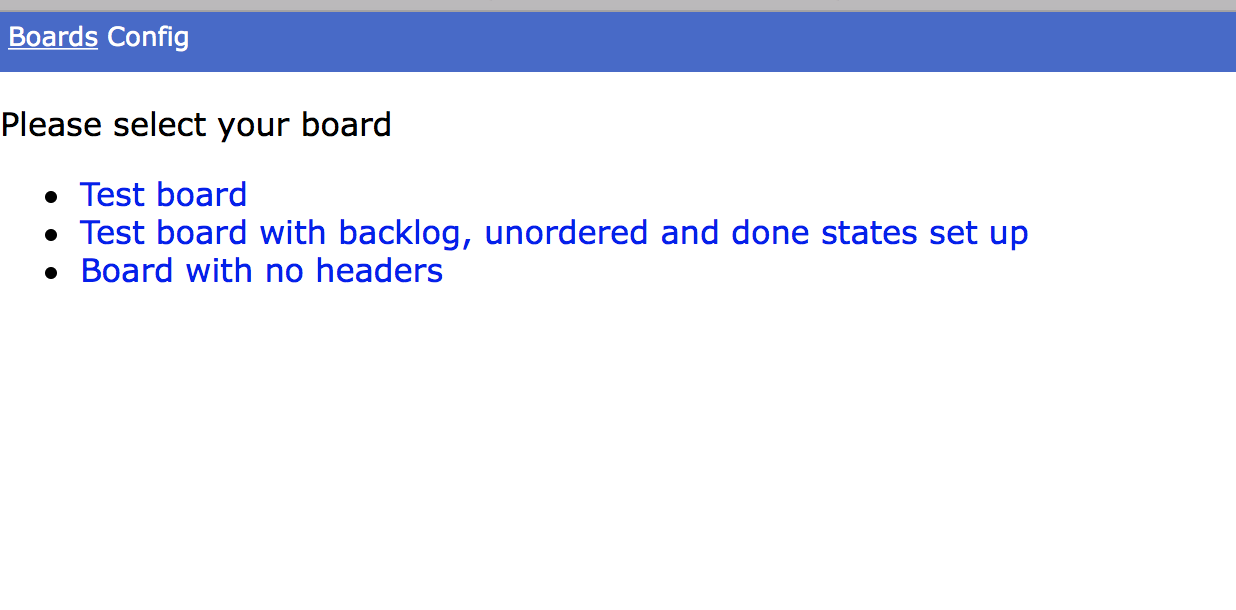
You will then be presented with a list of available boards that are set up in the Jira instance:
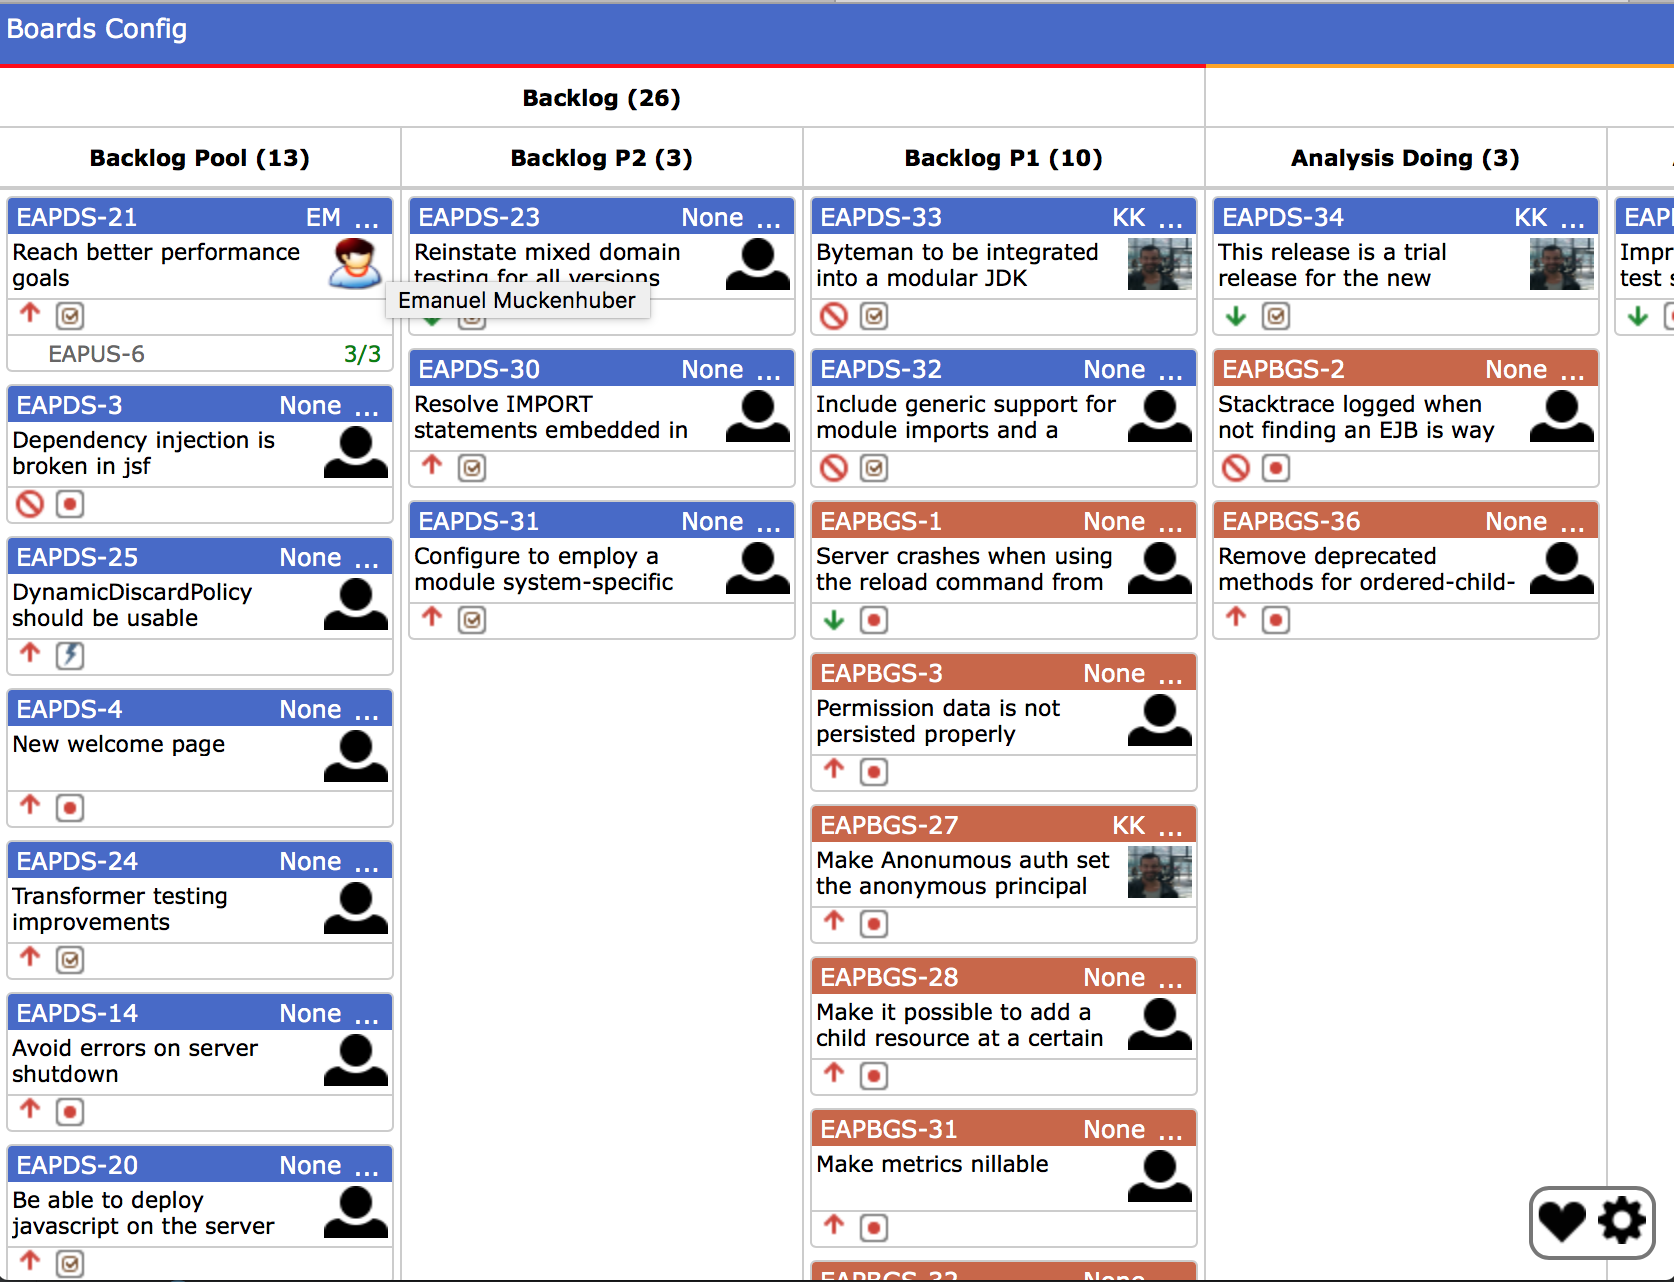
From the list of boards, select the board you want to view, and you will get presented with the view of the board:
The board is scrollable horizontally and vertically so you can see all issues in all states. We will discuss the different sections of the issue cards later. But for now, note that some issues on the shown board, such as EAPDS-21 in the top left, have an 'extra' section at the bottom. In the case of EAPDS-21 it lists EAPUS-6. This means that EAPDS-21 has a link to EAPUS-6. Not all linked issues are shown, in the case of this board EAPUS is one of the 'linked projects' configured for the board. Only links to issues from 'linked projects' get shown in this extra section.
If you click on the issue's key, in the card header, you get taken to the issue in Jira.
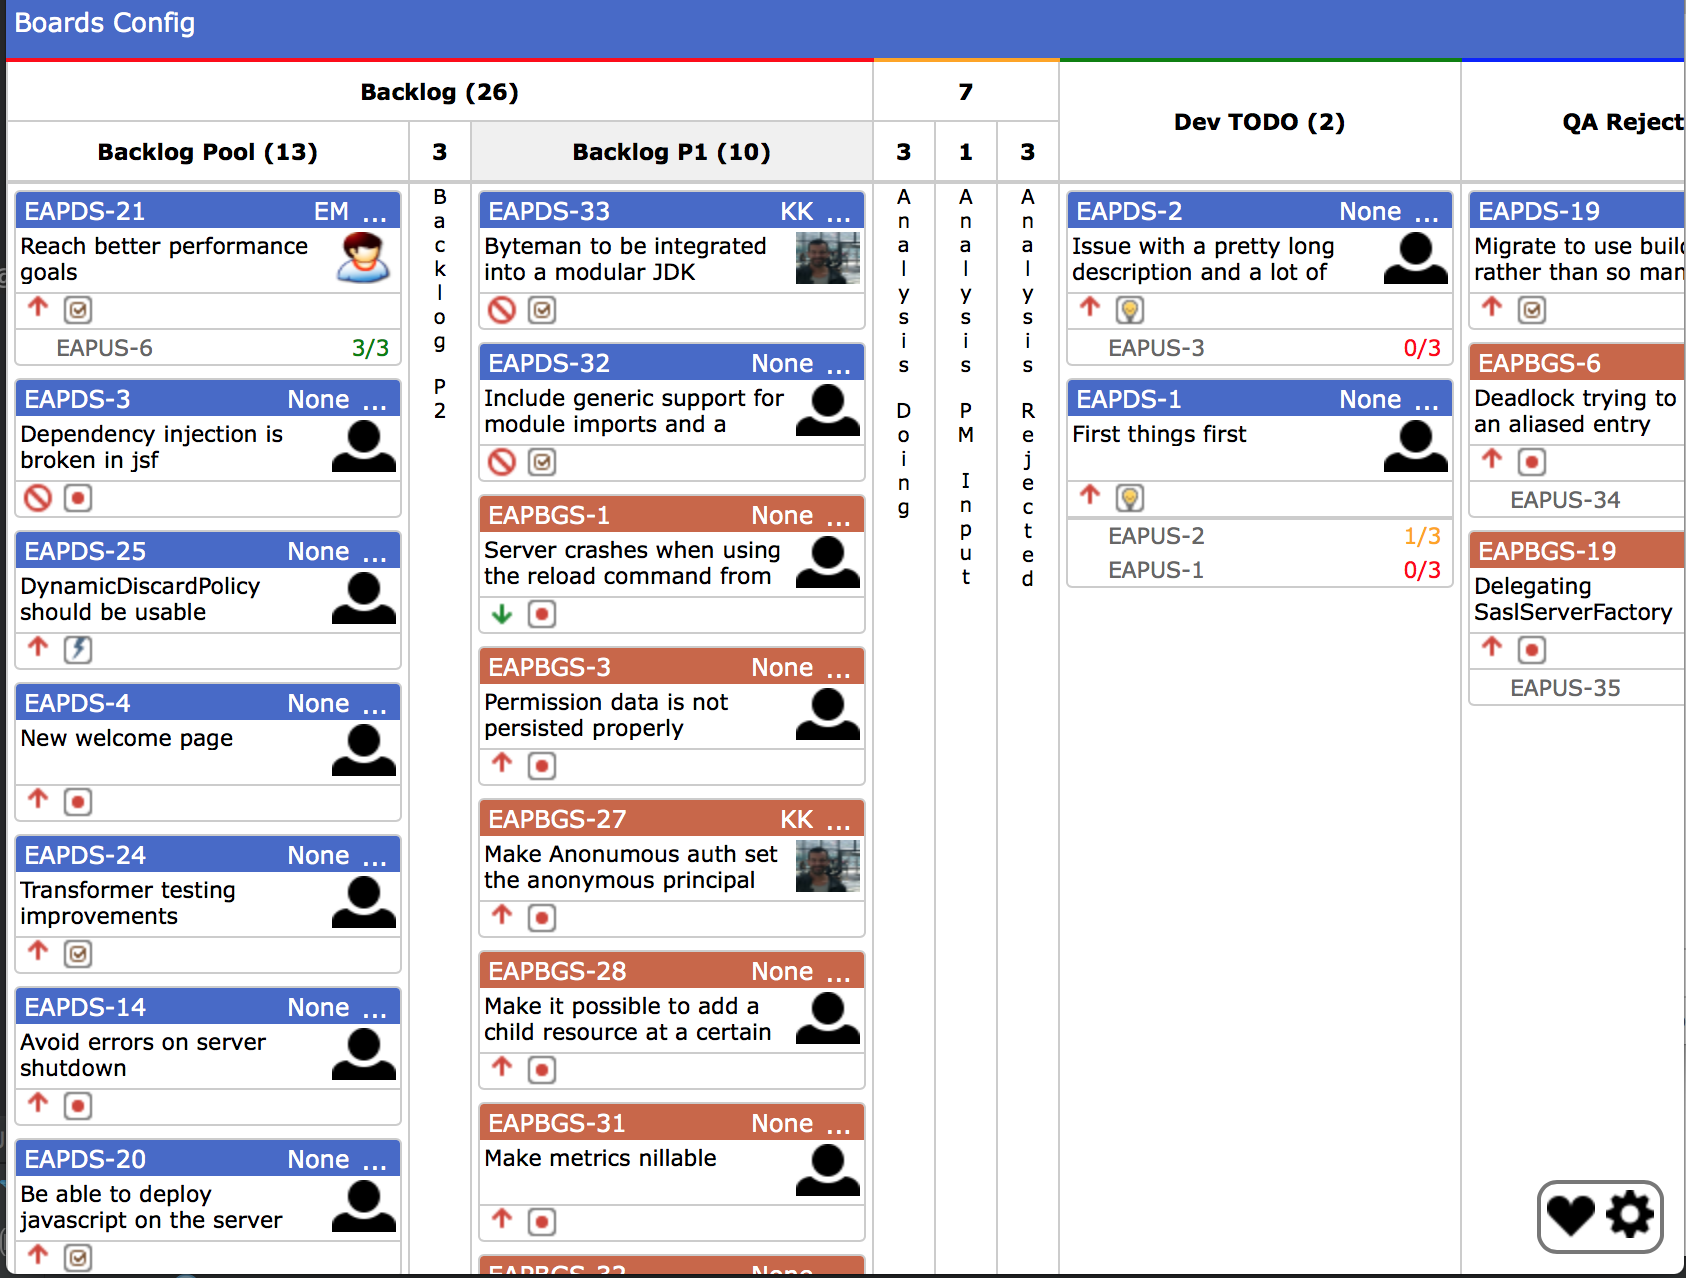
The column headers are clickable, so you can collapse columns, or groups of columns, that do not interest you:
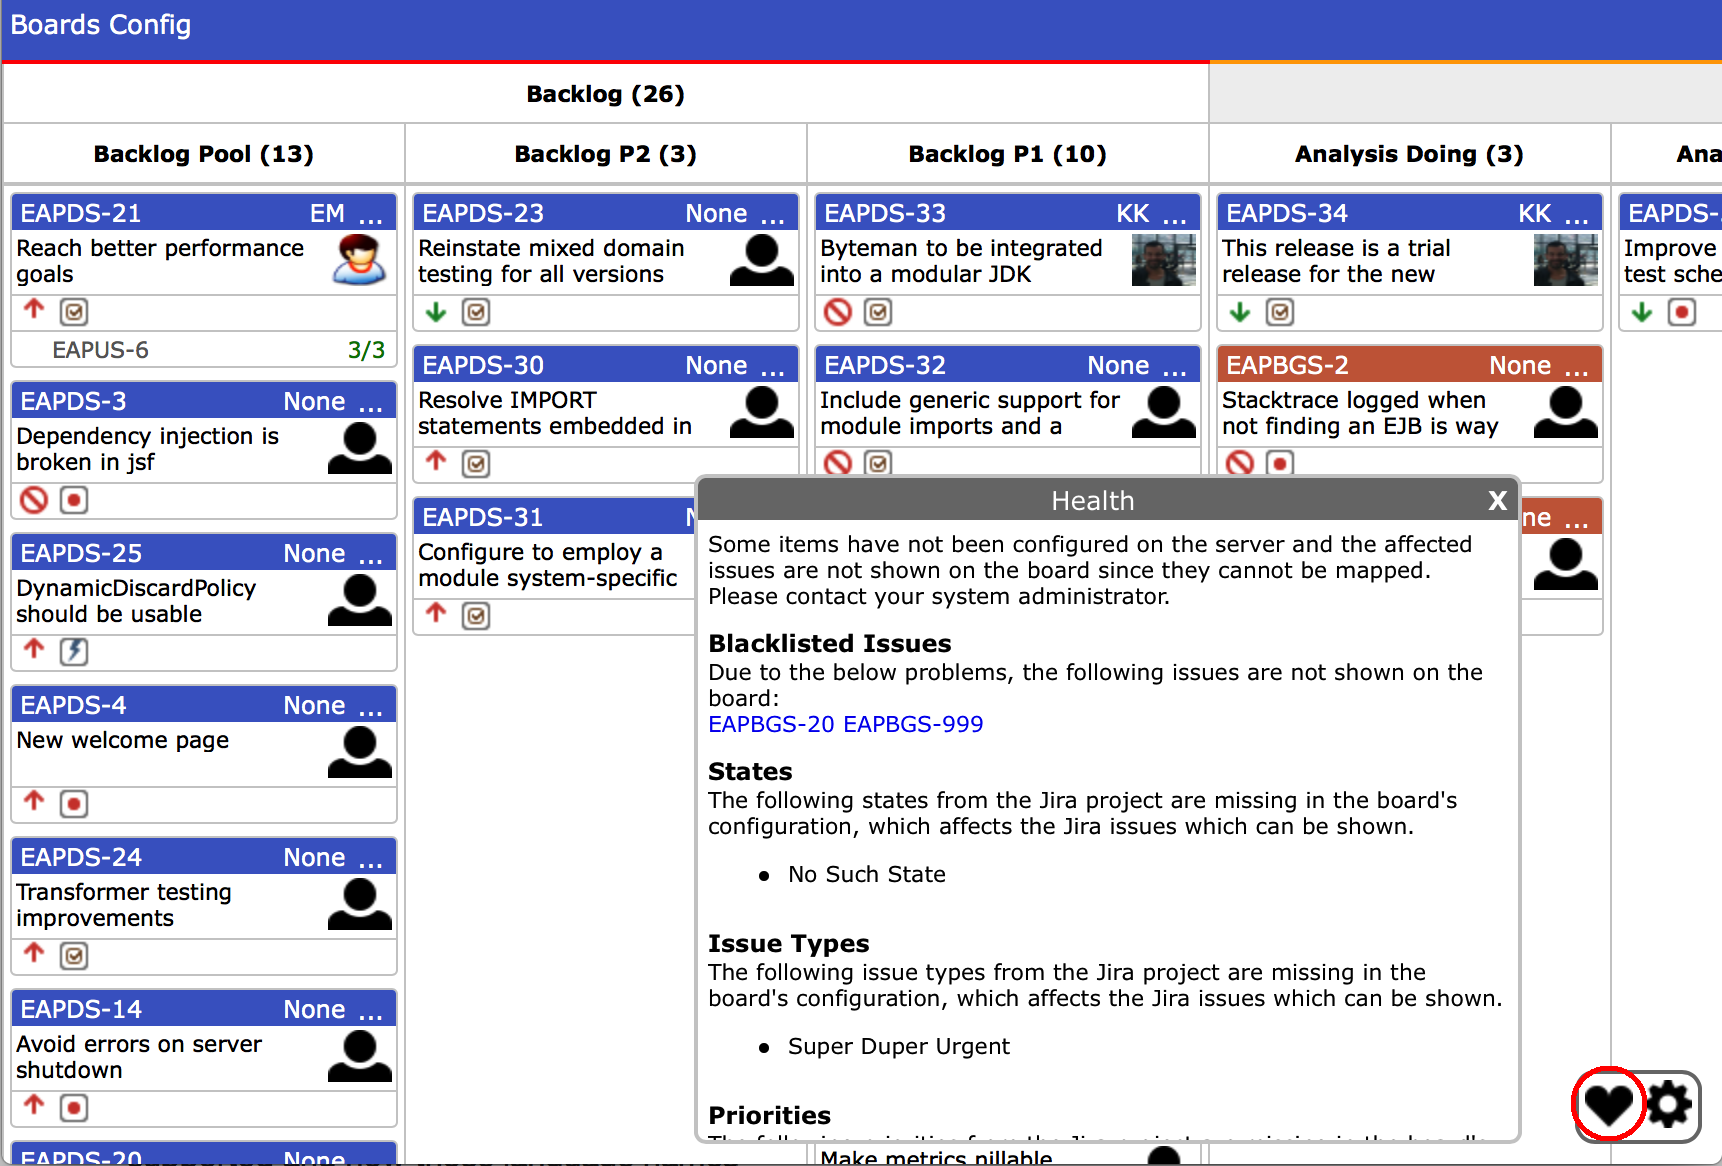
If something was not set up properly when configuring the board, a heart icon is displayed on the bottom right of the board. If the board's configuration is fine, the heart icon is not shown. Clicking on the heart icon displays the health panel, and provides the board administrator with the required information to fix the configuration:
In the above example we see that the board configuration is missing some states, issue types and priorities. For this reason the issues EAPBGS-20 and EAPBGS-999 cannot be displayed. Once the configuration is fixed, these two issues will be shown on the board again.
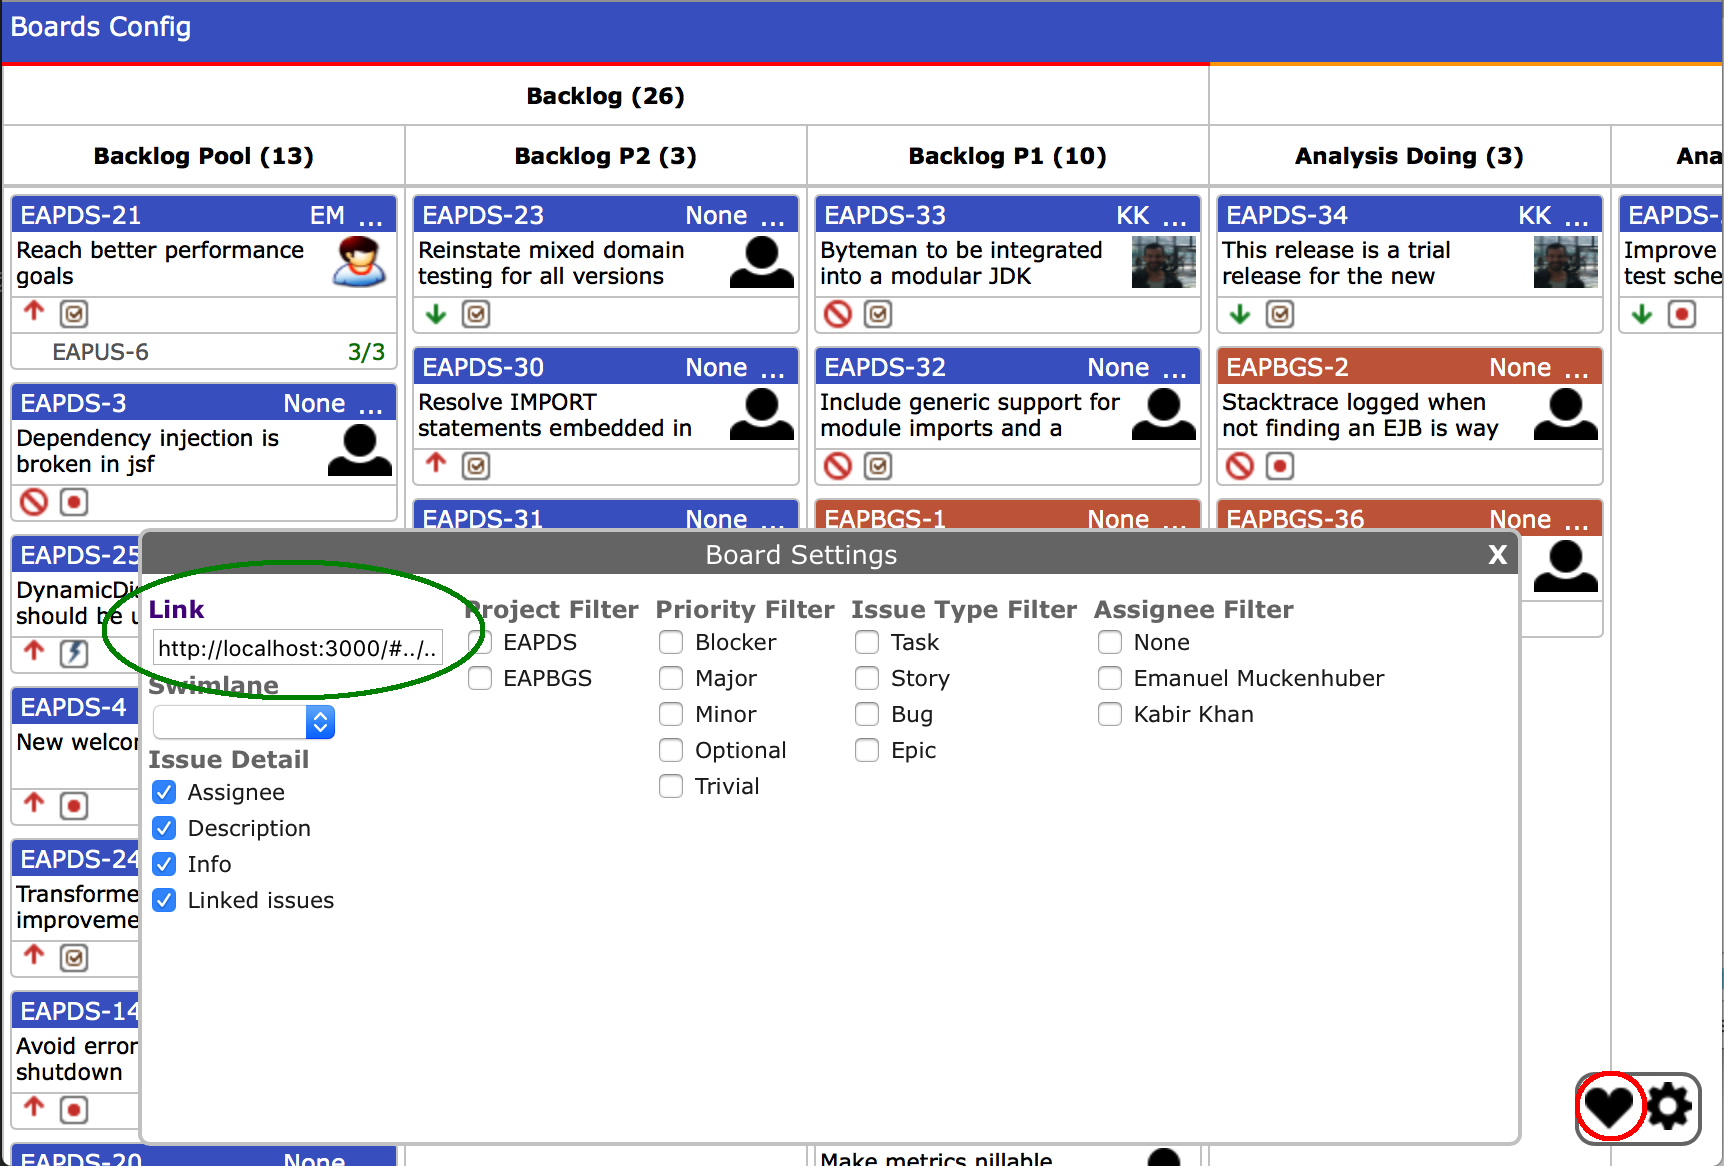
The control panel is the entry point to being able to alter the display of the board at runtime. All the data is tweaked on the client, so there are no extra roundtrips to the server when doing so. You can select the level of detail to be used when displaying the data, choose swimlanes, and filter the issues. To view the control panel, click on the cog icon in the bottom right of the board. As you make changes to the settings of the board, the 'Link' field gets updated with a URL to take you to the currently configured board so you can share links with your friends. You can also copy the link from the 'Link' header:
In the issue detail section of the control panel you can select the level of detail to use displaying the board's issues. By default all the details are shown, as seen in the previous image. The details you can turn off are:
- The 'Assignee' icon
- The 'Description'. This is the textual description of the issue next to the assignee icon. Turning this off will only take effect, if 'Assignee' is also unchecked.
- The 'Info'. These are the icons under the assignee/description, indicating the issue type and priority.
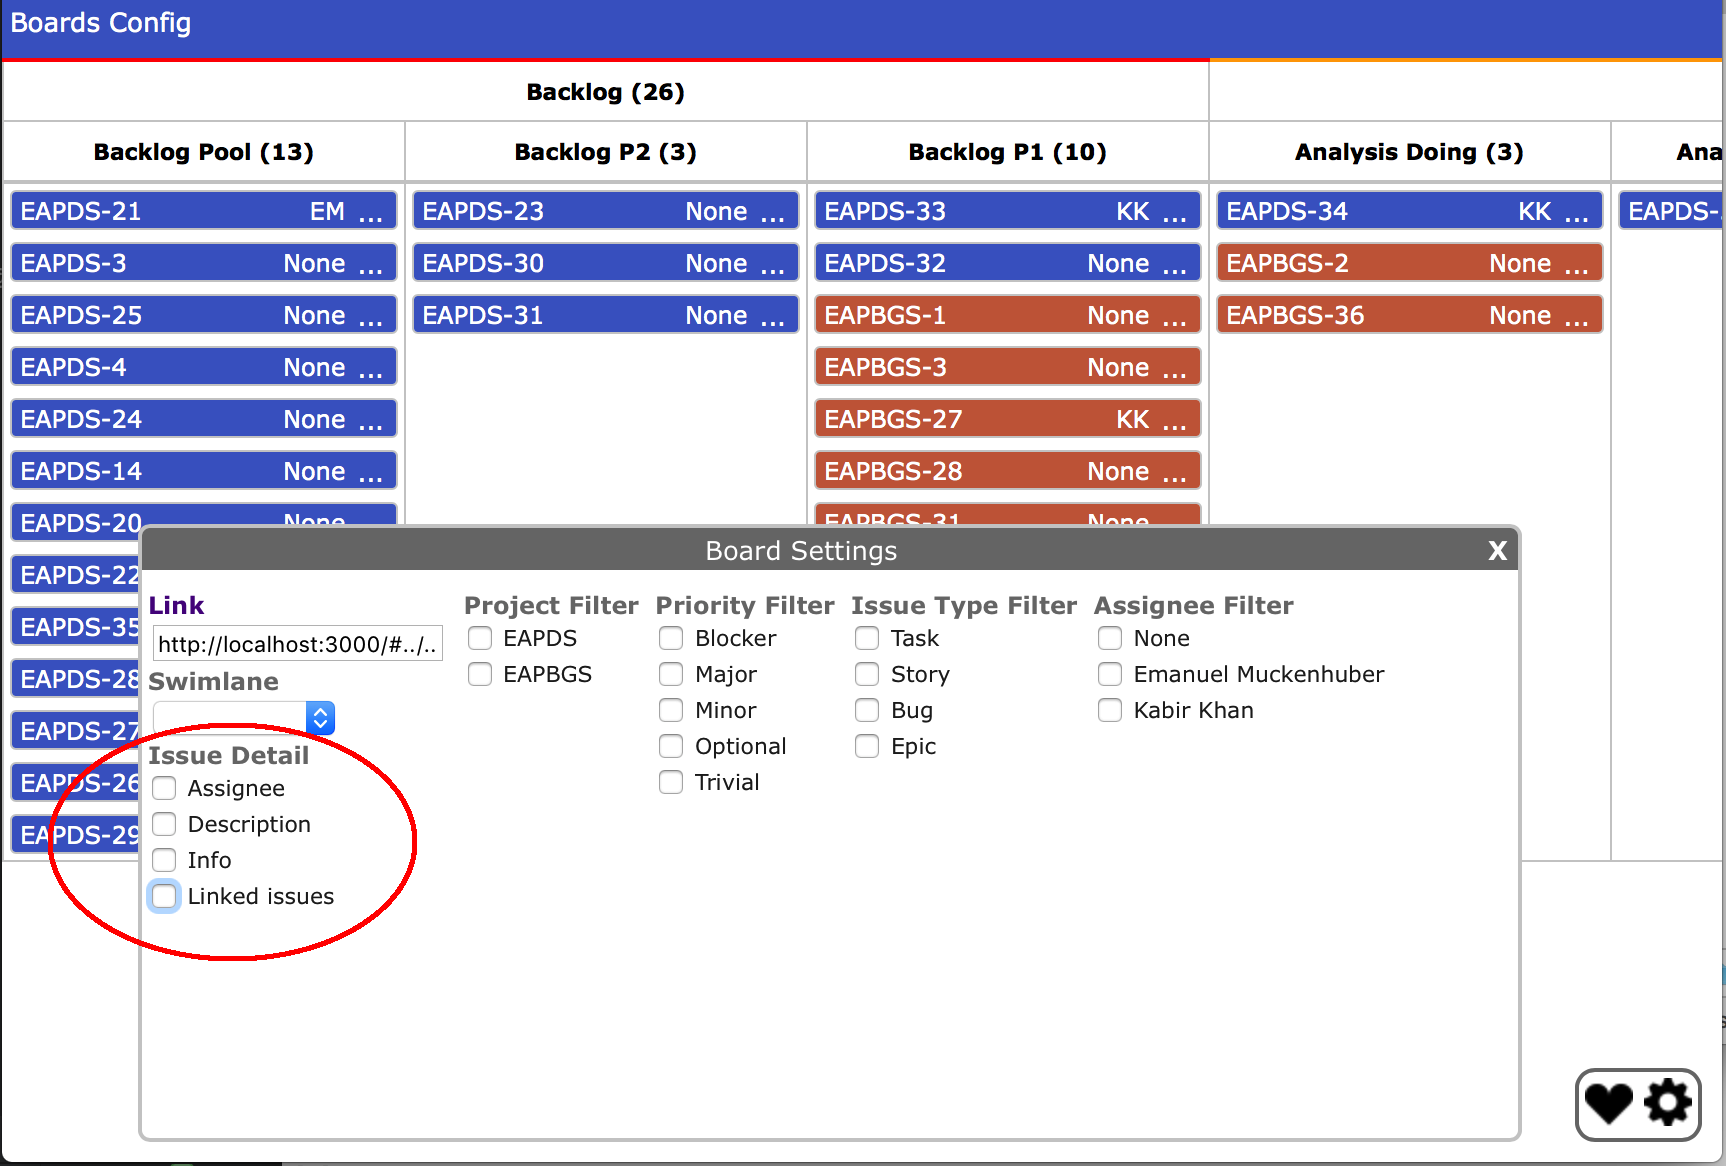
- The 'Linked Issues'. These are the issues shown at the bottom of some of the cards, e.g. EAPDS-21 at the top left of the previous image.
The following image shows the board with all the issue details turned off, so we only see the card headers:
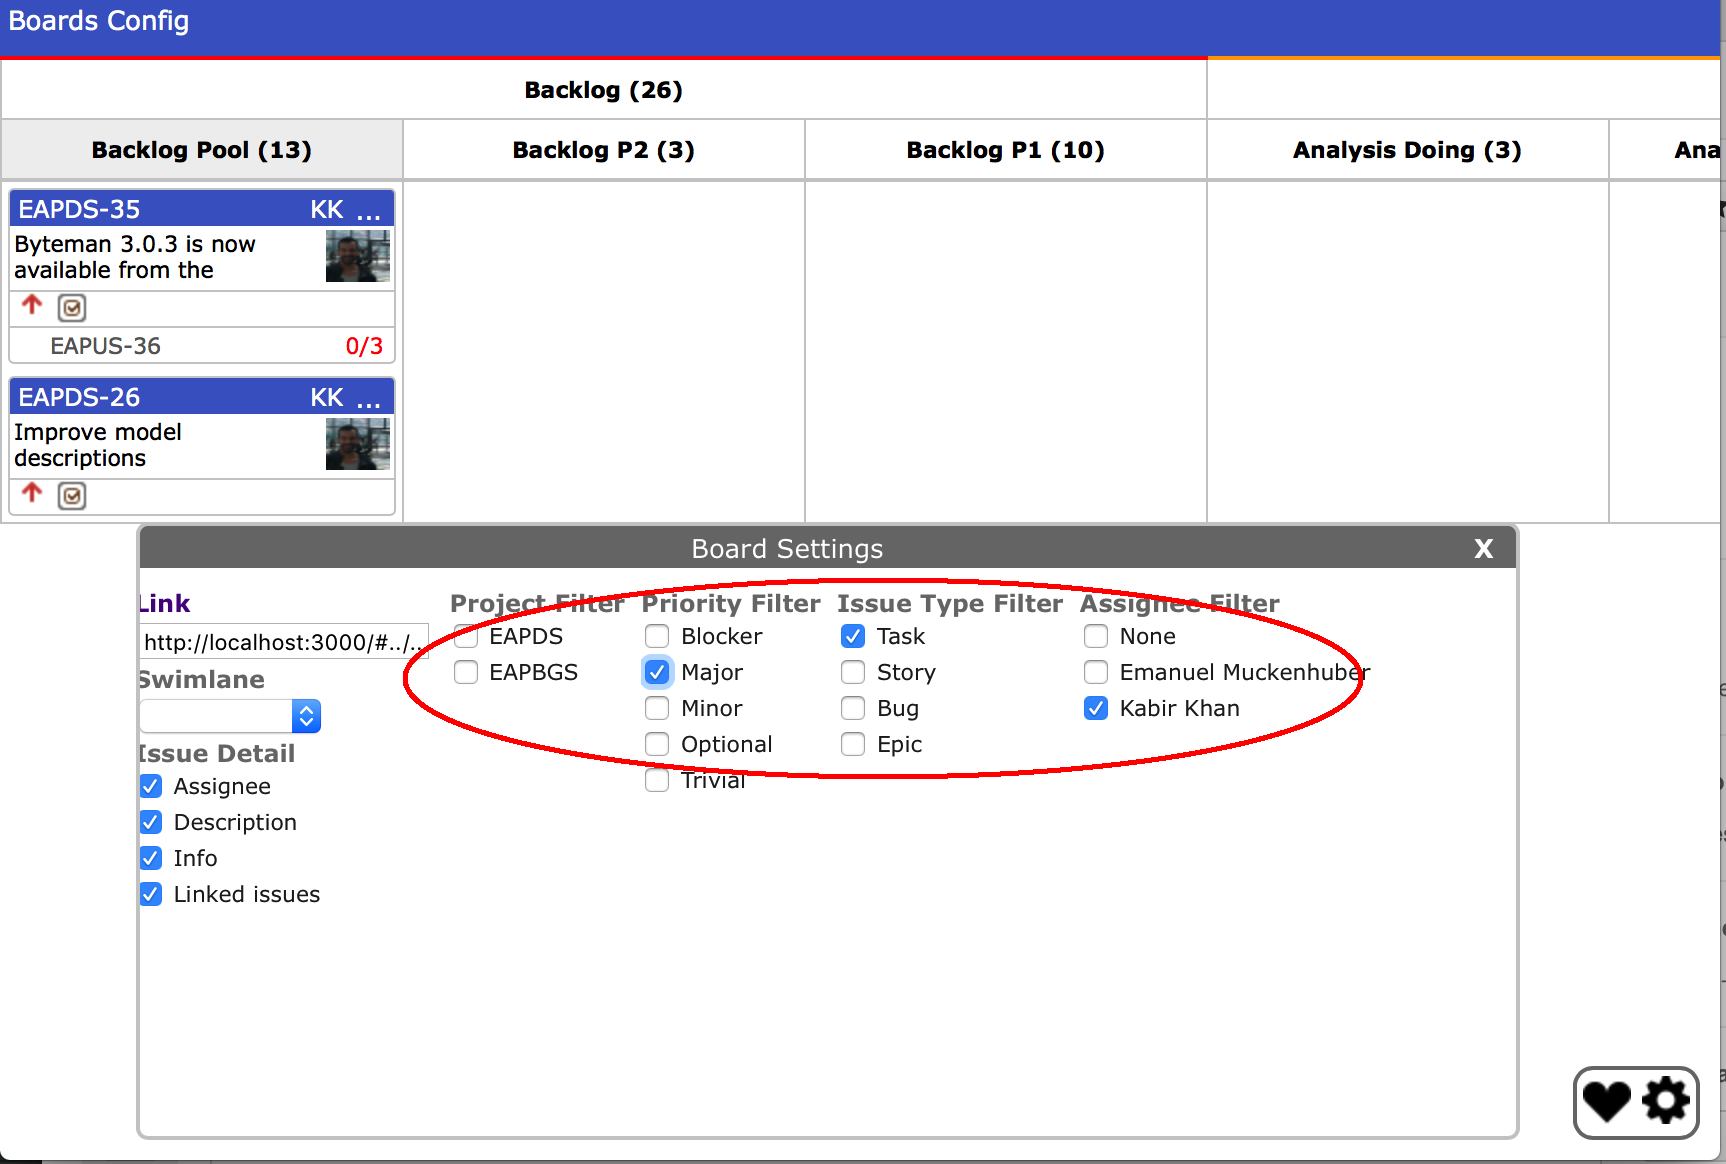
By default all issues are shown on the board. However, you can (currently) filter by project, issue type, priority, assignee and component to narrow down what is shown. Once you have selected to filter on some criteria, clicking on the control panel filter header resets the filter checkboxes. The following image shows the board filtered to only show 'Major' priority issues of type 'Task' belonging to Kabir Khan:
You can check as many of the filter checkboxes as you like. Checking all of the checkboxes for a filter category is the same as not checking any of them. For Assignee and Component, there is a special value 'None' which allows you to pick out issues with no assignee/component.
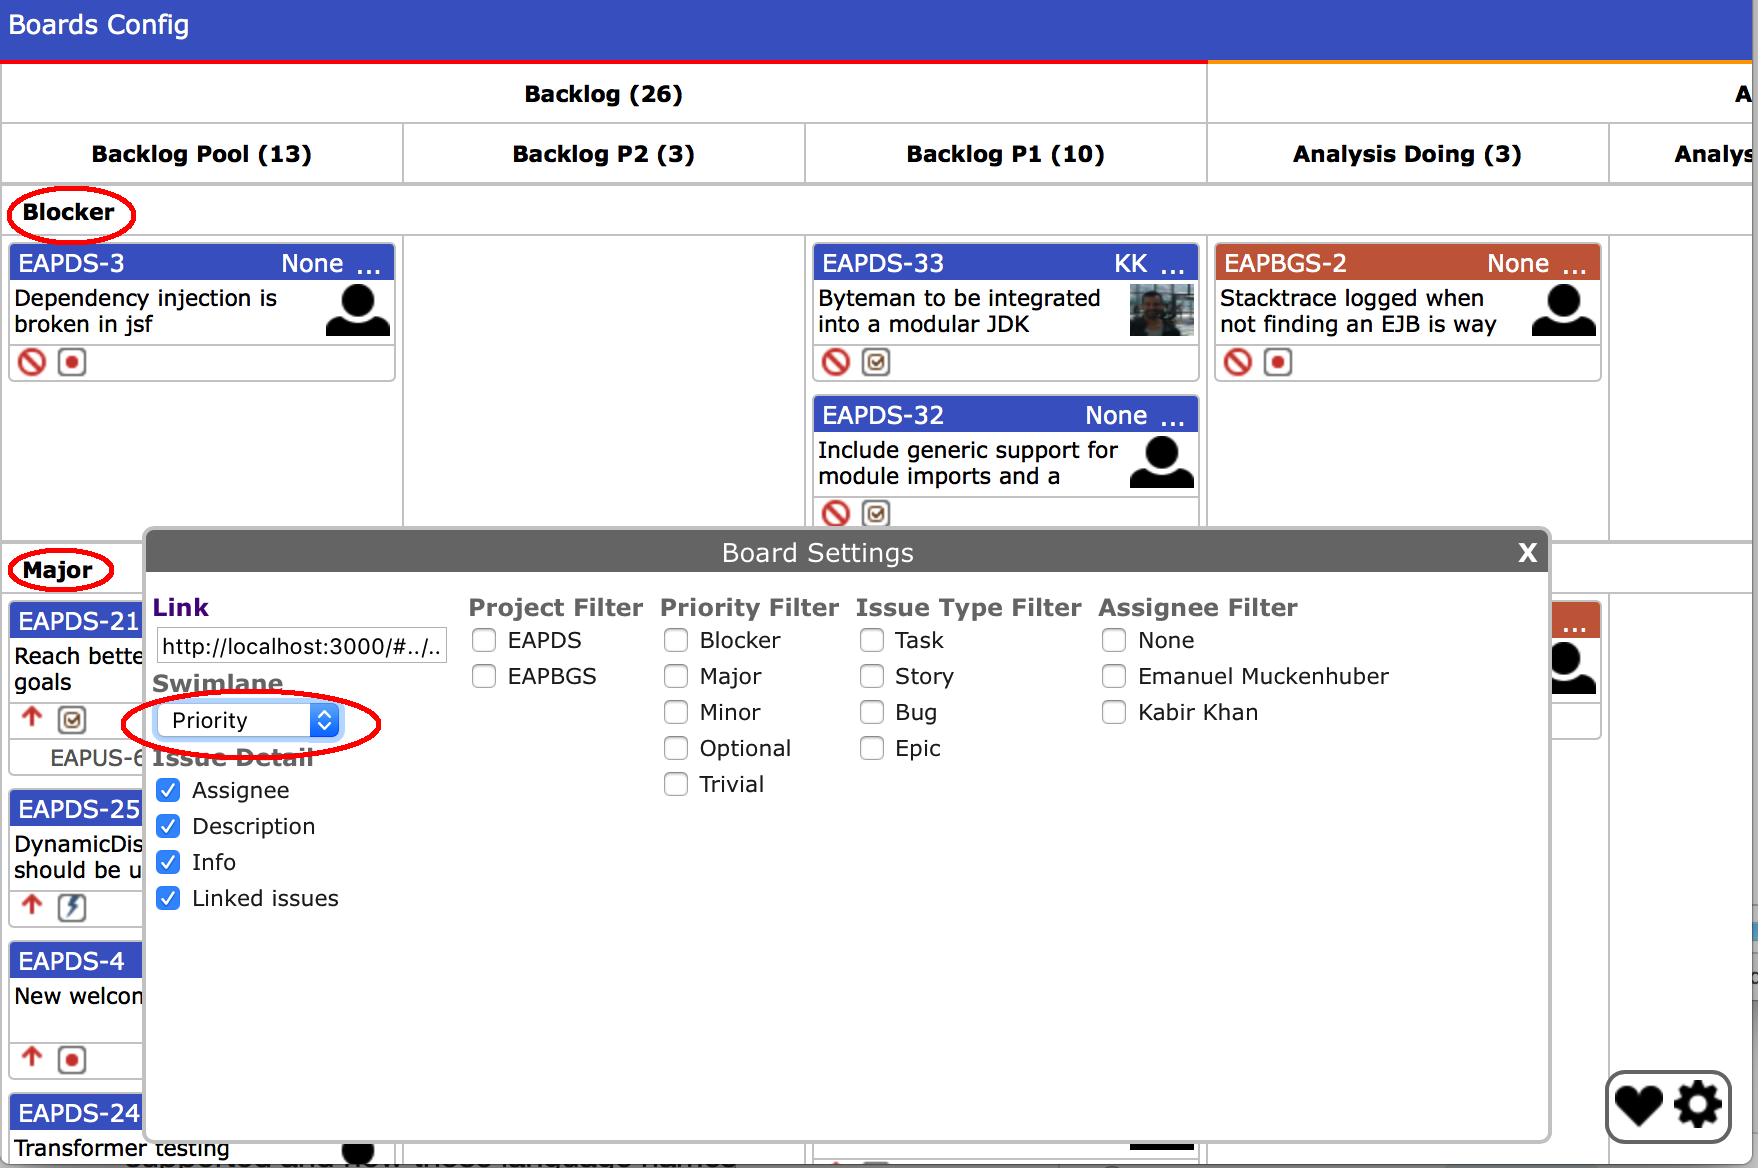
To get a better overview you can group issues into swimlanes by (currently) project, priority, issue type, assignee or component. The following image shows the board using swimlanes by priority:
The board's 'Blocker' and 'Major' swimlanes are visible in the board in the above image. The 'Blocker' one contains all the board's blocker issues, and the 'Major' one all the major issues. If you click on the swimlane headers you can collapse the swimlane.
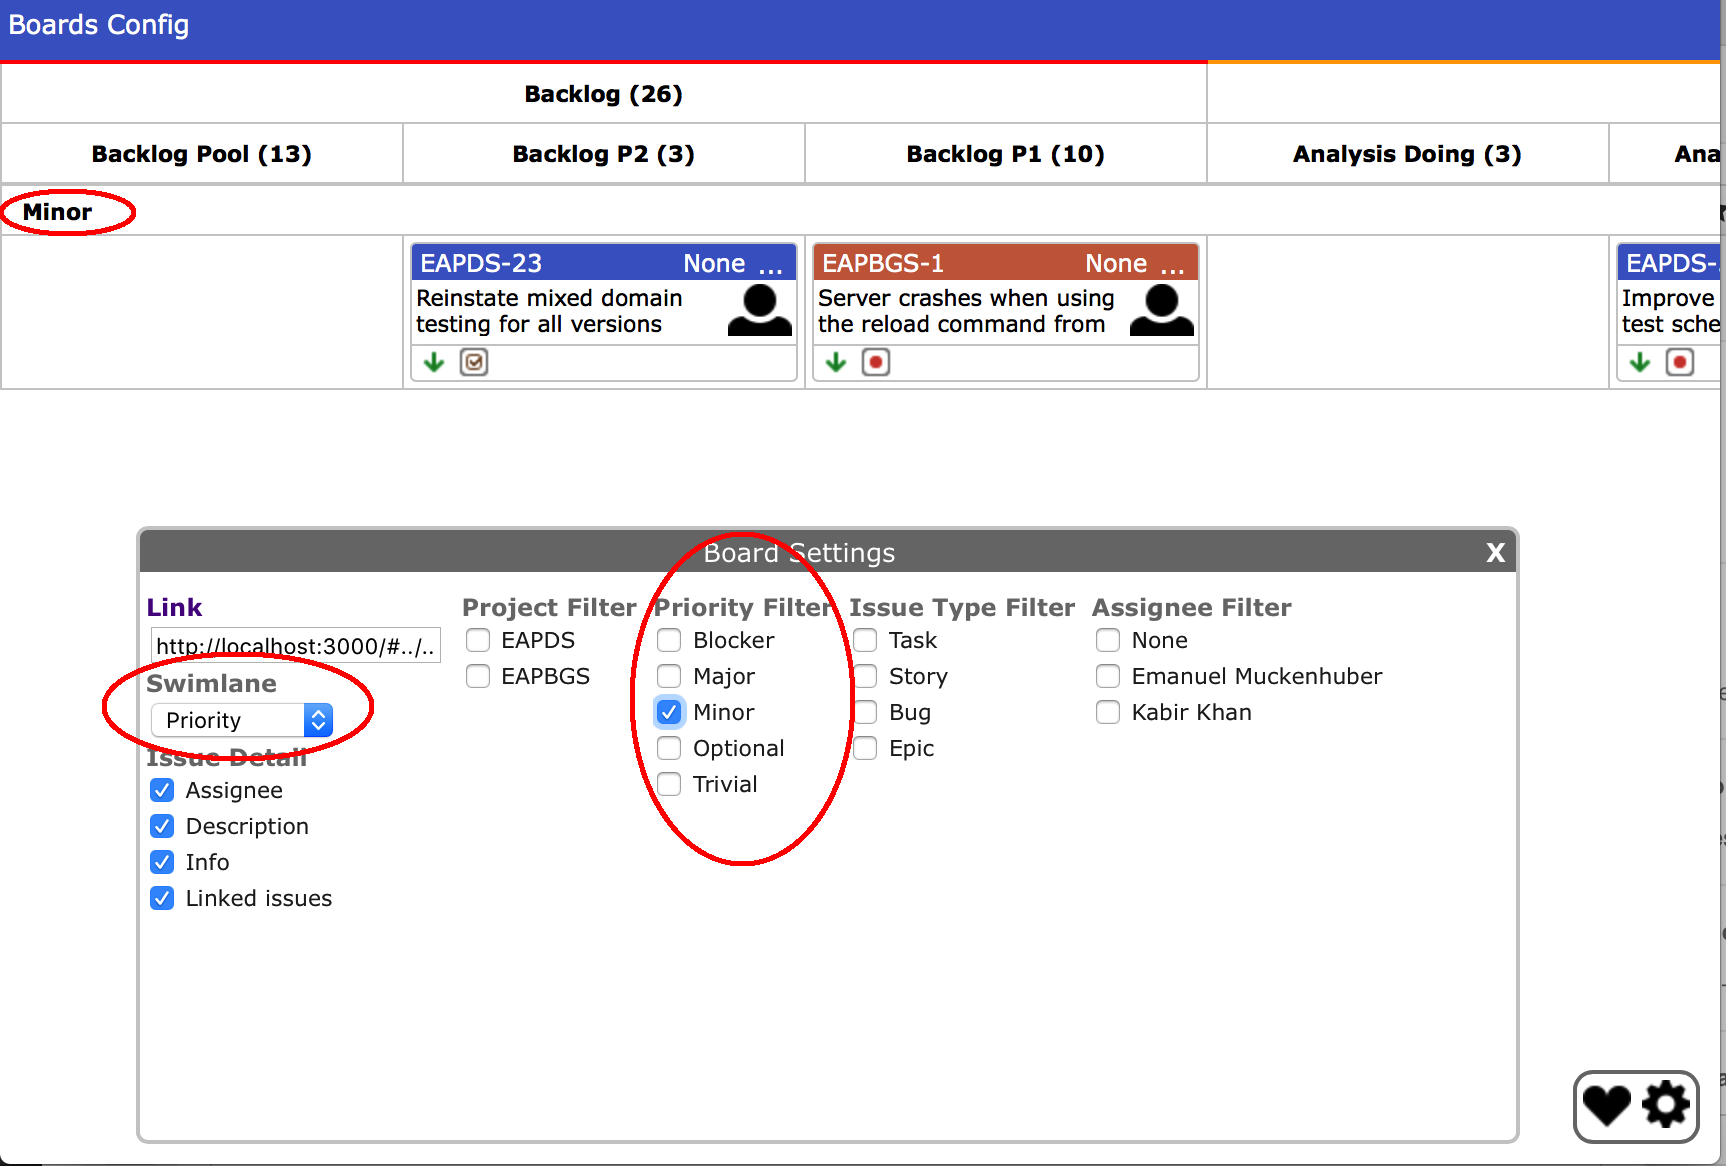
You can combine swimlanes and filters. The below image shows the board arranged in swimlanes by priority, but only showing the minor issues. Since we are not showing any of the other priorities their swimlanes are completely hidden on the board.
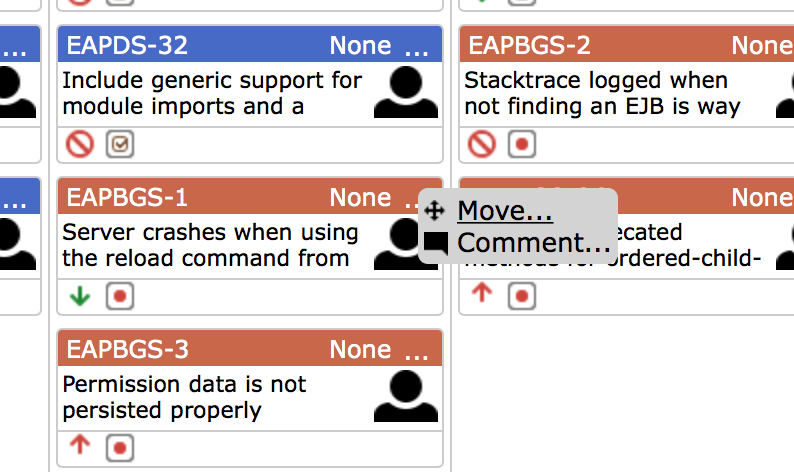
Right-clicking an issue, or clicking an issue's '...' in the top left of its card, brings up the context menu:
From the context menu you can (currently):
- move/rank an issue
- comment on an issue
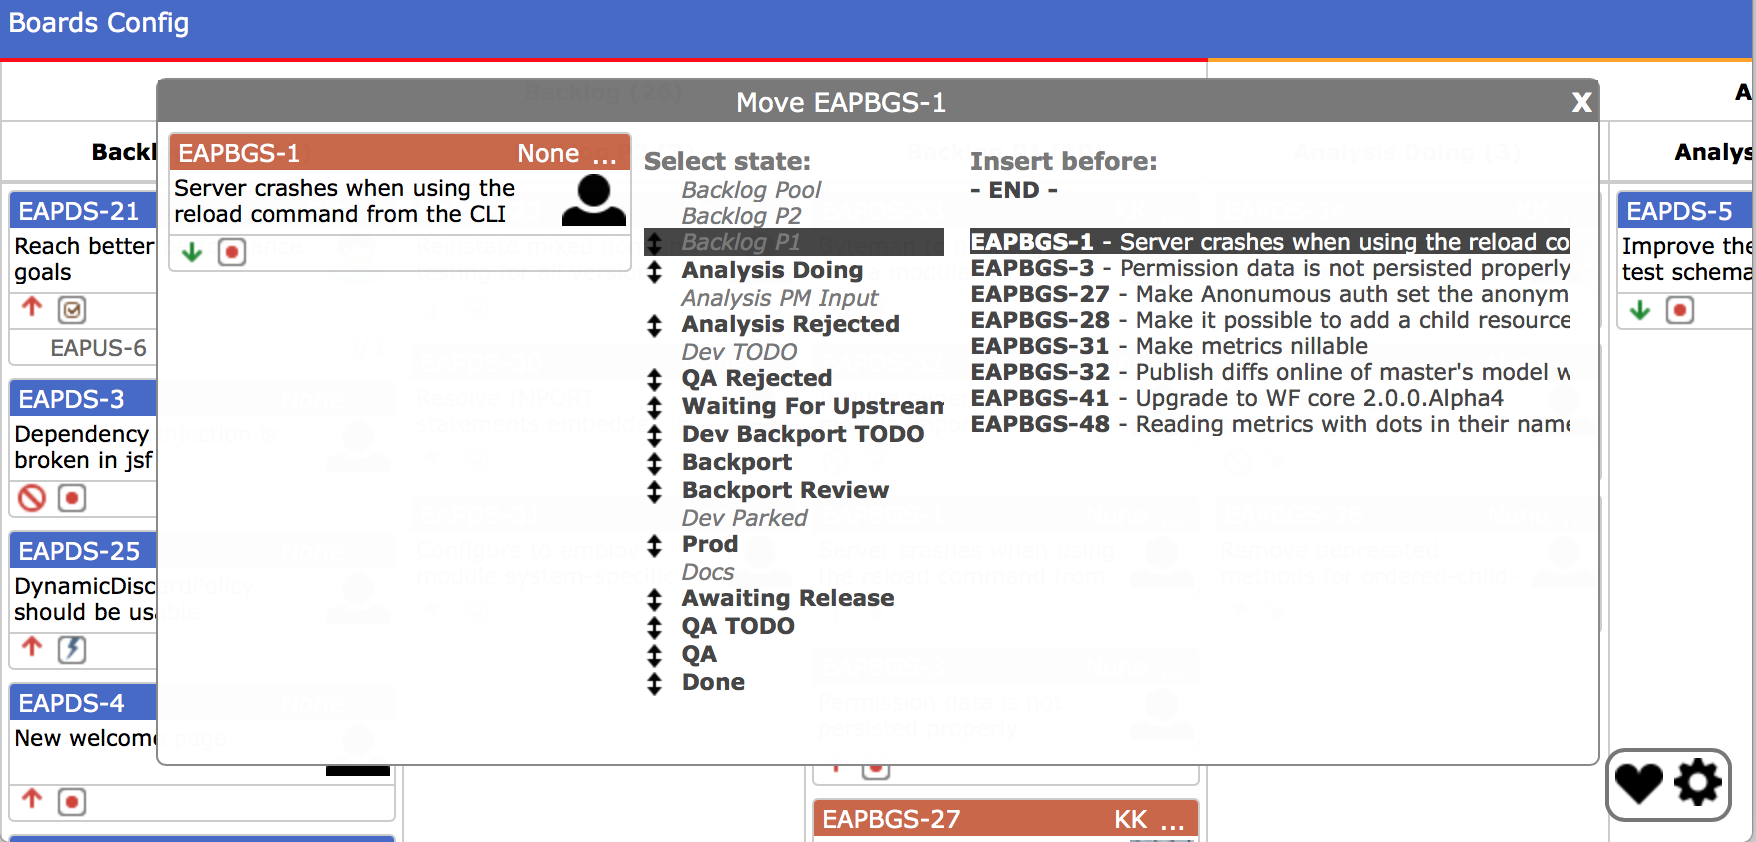
The move issue pane initially displays:
- the issue card
- the valid states that the issue can be moved to (with the issue's current state highlighted). Invalid board states are greyed out.
- the list of issues in the highlighted state. Please note that Jirban does not support ranking issues from different projects, so only issues from the same project as the selected issue are shown. Also, when swimlanes are used, only issues from the same project AND same swimlane are shown.
To re-rank the issue within the highlighted state, click on the issue you want to insert it before. To move it to the end, click on '- END -'.
To move an issue to another state, click on the state name in the middle list, and it will get inserted there according to Jira's ranking rules.
To move an issue to another state AND control where in that state's ranking order it goes, click on the up-down icon on the left of the target state's name. The view will then change to highlight the selected target state, and show the list of the issues in the selected target state.
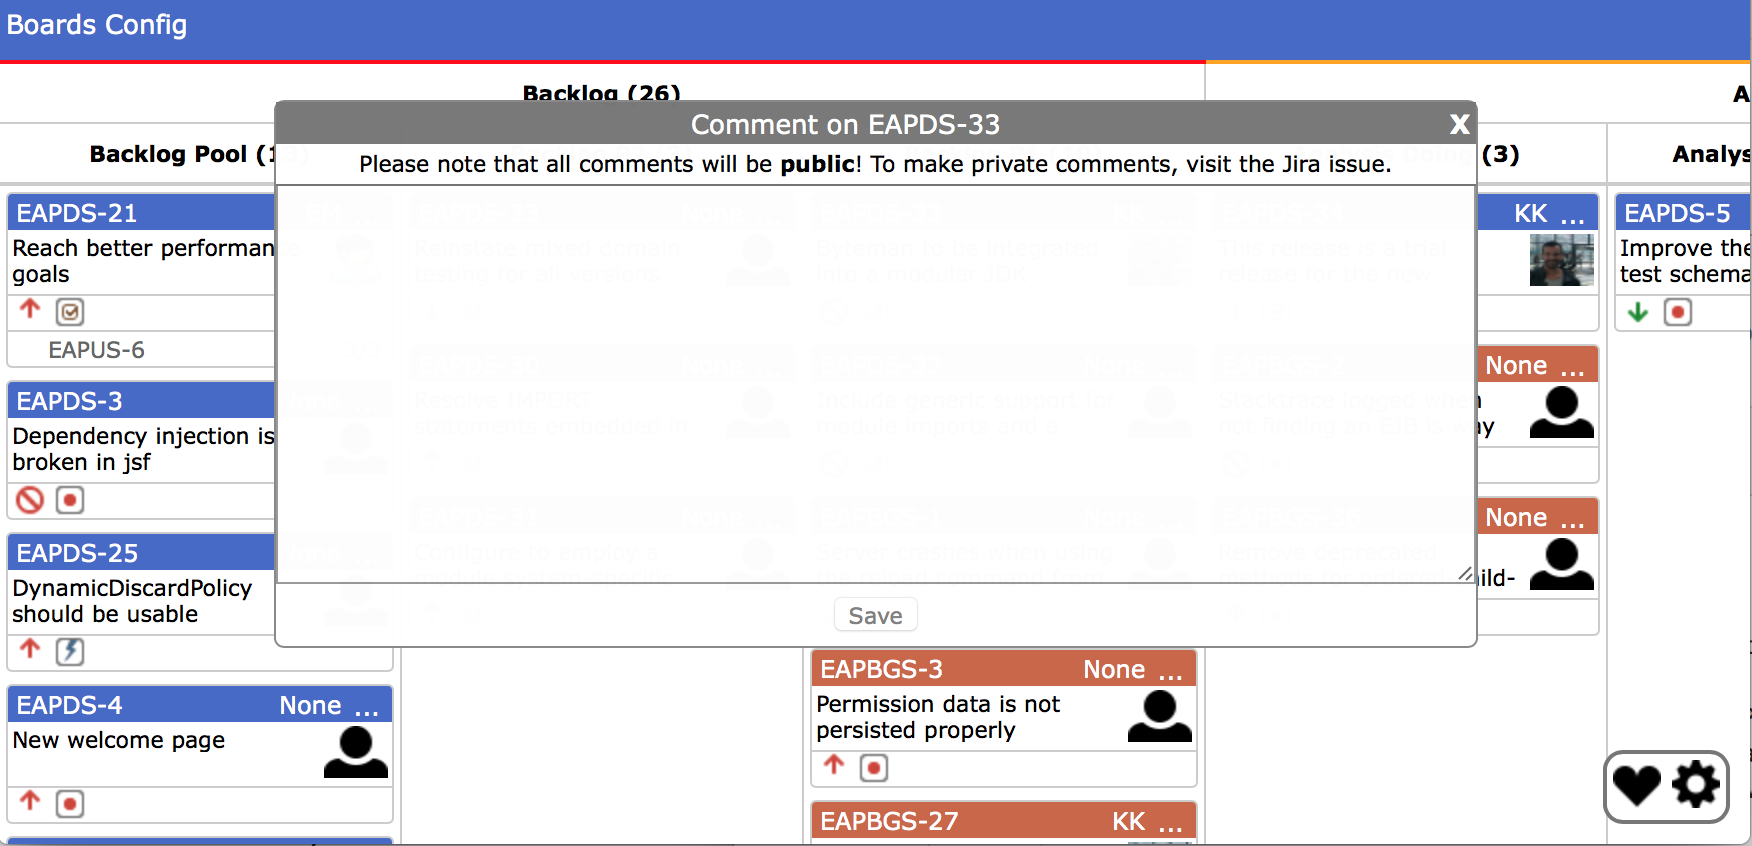
To comment on an issue, enter text in the displayed text area. Similar markup to what is used in Jira can be used. Please note that all comments will be public. For comments where you want to narrow down who can see them, e.g. by Jira role, please edit the issue directly.
To set up more boards, or reconfigure an existing one, click on the 'Config' item in the top blue toolbar, and follow the instructions in the Developers Guide. Configuring boards can only be done by a Jira Adminstrator, or someone who is an administrator of all the main projects set up in the board.
